May 302013
 

Now that we’ve gotten the necessary supplies that we ran out of, Rick is going great guns trying to finish the Studio.

IMG_4510.1

And the yard has turned into a construction zone once again, with much of the deck of the new building housing the heavy equipment.

It also provides a little shelter from the on/off rain showers we’ve been getting.

IMG_4511.1

When the first wall was put in I finally started getting excited.  It’s really hard to not go out there every five minutes and see how much has gotten done.

When I did my final walk-through on Sunday, I felt like the people on “Restaurant Impossible” when they finally get to see their remodeled restaurant.

IMG_4541.1

All four walls were completed plus the North and South gables.  The Western side of the ceiling was about half done which got me even more giddy.

IMG_4539.1

Since I know how much work was put into cutting the wood so that it would joint together and be able to move with the change in temperatures, I was almost brought to tears looking at the work in progress.

As with everything that Rick has every built, this will truly be one-of-a-kind and I can’t wait to see what he has in mind for the trim and finishing work that will be done once the ceiling is completed and the flooring is put down.

The man may be a computer geek, but he’s still a carpenter at heart.


May 272013
 

A few weeks ago I shook my head in disbelief at the amount of snow that got dumped on us and the impact that it had on the homestead.

IMG_4433.1

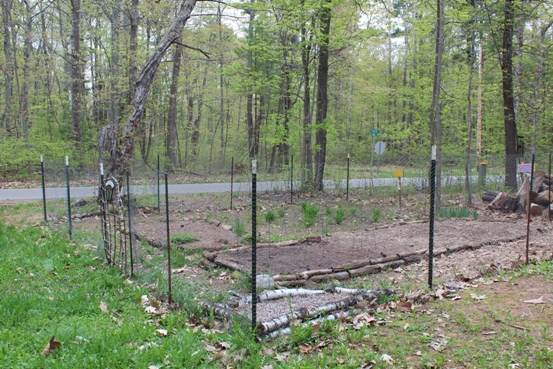
The garden fence in particular took quite a beating.

Since then I’ve been spending a lot of time picking up branches and twigs that have been covering our yard from the numerous storms we’ve had.  Just when I think that I’m all done, WHAM! another system comes through and I’ve got to start all over again.

Maybe this is Mother Nature’s way of giving me a warm-up workout for planting and tending the garden.

Which is exactly what I wanted to do this Memorial Day, but first I had to get that darn fence in tip top shape.

IMG_4536.1

And with the help of Rick and his muscles to pound in the new fence posts, the goal was achieved!

Now all of my plants can be safe from the marauding deer that just love to graze on the succulent plants that I tend to so hard.

IMG_4535.1

Most of the garden is going to be cucumbers of which 80 percent have grown to a hardy size.  I wish I could say the same about the basil which is staying stunted to an inch, but I’m going to plant them anyway.

Gotta show ’em who’s boss.

One surprise that I wasn’t counting on (do we ever count on surprises?  I think not, but I feel like talking stupid today) was a gift from my old boss.

IMG_4545.1

These little beauties are from squash that have not been planted for 800 years.  With less than 50 seeds left in existence I’m very nervous about my green thumb being able to successfully produce the plants that will give me a squash or two.

But I’m up for the challenge if that kind of faith has been put in me.  It will also be my first time “seed saving” so I can gift the seeds back to him to pass onto others and build up the supply.

Wish me luck and I’ll keep you posted!


May 182013
 

Now that the weather looks like it may return to it’s previously scheduled Spring outlook, Rick can get back to working on my studio in semi-comfortable conditions.

IMG_4449

All that insulation that he put in last fall is now being covered with poly so I’ll be roasty toasty next winter.

As with all well-laid plans, he got 3/4 of the way done and ran out of material.

IMG_4450

But there’s always little pesky things that can be done in the meantime, like running the wires for the security cameras.

Oh yes, I will have many comforts of home in this little building:  Cable TV, internet, pellet stove.  That man pulls out all the stops for me.

And to think I only wanted a little box building to make my jewelry in.

What was I thinking?


May 082013
 

As much as I love trying out the plethora of recipes from my Mom’s collection, Rick still likes to have some stability in his life.

And in our house that comes in the form of Chocolate Chip Cookies.  But even I get tired of the same old tried and true recipes once in a while and I need to throw caution to the wind and try something new.  Fortunately I didn’t have to throw it too far.

Last Summer Nichole passed along a recipe that she found on Allrecipes, so I thought I’d give it a shot.

:::

IMG_4360.1

Chocolate Chip Pudding Cookies

Ingredients

  • 2 1/4 cups all-purpose flour
  • 1 tsp baking soda
  • 1 cup butter, softened
  • 3/4 cup packed light brown sugar
  • 1/4 cup white sugar
  • 1 (3.4 oz) package butterscotch pudding mix
  • 1 tsp vanilla extract
  • 2 eggs
  • 12 ounces semisweet chocolate chips
  • 1 cup chopped walnuts

Directions

Preheat oven to 375 degrees.

Combine the flour and baking soda.  Set aside.

Mix the butter, brown sugar, white sugar, pudding mix, and vanilla.  Beat until creamy.  Add the eggs and mix well.  Gradually stir in the flour mixture.  Stir in the chocolate chips and the chopped nuts.  Drop from teaspoon onto ungreased cookie sheets about 1 inch apart.

Bake at 375 degrees for 8 to 10 minutes.

:::

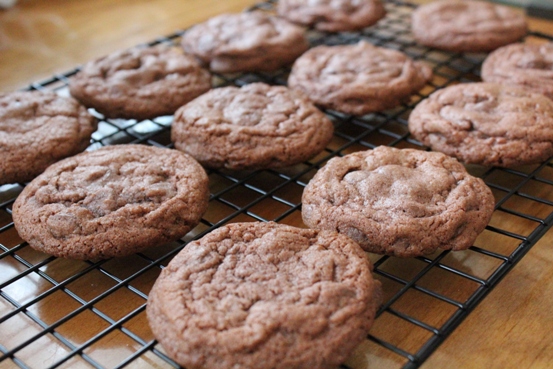
Oh. My. Gawd.  You will not believe how fantastic these things are!  These bake up nice and soft with just the right amount of sugary sweetness that you expect from a chocolate chip cookie.

Naturally I did a few substitutions (as if you couldn’t tell from the picture) like using chocolate pudding mix and milk chocolate chips, and I omitted the nuts.  Really watch these babies when they get to the 8 minute mark because you don’t want to overcook them (I pulled mine at 8 minutes).

I’ve since made these with vanilla pudding and they were delish!  I’ve got a box of pistachio pudding in the pantry, so I wonder what that would taste like with Ande’s mint pieces?

You can bet that I’m going to find out!


Apr 232013
 

While I’ve been pouring over my Mom’s collection of recipes, I’ve also been sifting through cookbooks that I’ve had laying around the house for centuries.

One in particular had a “flag” on a page that at one point in history must have piqued my interest (obviously), and once I looked at it several reasons why became clear:

1.  It was simple;

2.  It had the word “Cheesecake” in the title; and

3.  It had the word “Chocolate” in the title

What wasn’t there to love about it!

Ready?

Here we go!!

Chocolate Cheesecake Muffins

Chocolate Cheesecake Muffins

Filling:

  • 1 – 3 oz pkg softened cream cheese
  • 2 tbsp granulated sugar

Muffins:

  • 1 cup all-purpose flour
  • 1/2 cup granulated sugar
  • 3 tbsp unsweetened cocoa
  • 2 tsp baking powder
  • 1/2 tsp salt
  • 1 egg, beaten
  • 3/4 cup milk
  • 1/3 cup oil
  • Icing sugar (optional)

Preheat oven to 375 degrees.

In a bowl combine cream cheese and sugar; beat until light and fluffy.  Set aside.

In another bowl combine flour, sugar, cocoa, baking powder and salt.  Make a well in center of mixture.

In another bowl combine egg, milk and oil.  Pour into flour mixture; stir just until lumpy and moist.

Spoon batter into prepared muffin tin, filling cups half full.  Add 1 tsp cheese filling; top with remaining batter.

Bake in preheated over for 20 minutes.  Dust with icing sugar, if desired.

Chocolate Cheesecake Muffins 2

These muffins turned out moist and delicious!

Naturally, I did a couple things slightly different.  Instead of using a regular 12-cup muffin tin, I pulled out my Texas-sized/ginormous 6-cup muffin pan.  This only yielded 4 muffins, but it was perfect for a “test” batch.  With this size pan I had to cook them a little longer than the 20 minutes called for in the original recipe.

The other tiny difference was I always add my sugar on the top of the muffins before I bake them, that way they settle a little bit into the batter and you have nice sugary crunch when you take a bite.

Overall there wasn’t a single thing I didn’t love about these muffins!  There are not overly chocolatey and the cream cheese filling added a nice little decadent factor without stealing the show completely.

Definitely a keeper!!